(Adjustable Height Vertical Blinds | 127mm Slats)
Measuring tape
Pencil
Spirit level
Drill
Screwdriver
Scissors
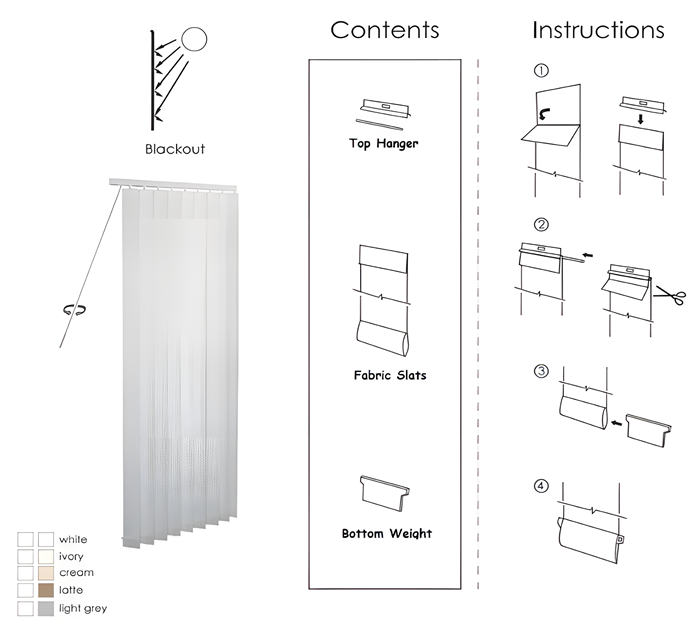
Pre-assembled headrail with carriers
Fabric vertical slats (127mm width)
Top hangers
Plastic sticks (for height adjustment)
Bottom weights
Bottom connecting chain
Control wand (child-safe)
Mounting brackets
Screws & wall plugs
Before installing the blind, always check the track operation.
Hold the headrail firmly in your hands.
Slide the carriers left and right along the track.
Turn the control wand to rotate the carriers fully open and closed.
Movement should be smooth and even
No clicking, jamming, or resistance
This step ensures the internal plastic carriers are correctly aligned before installation.
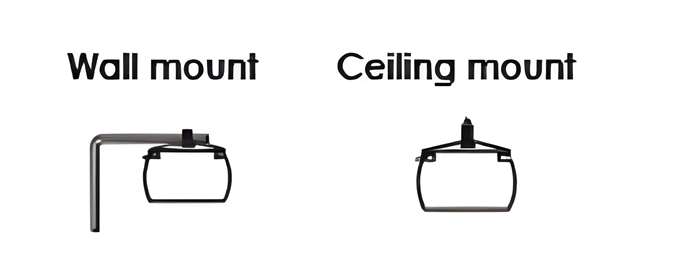
Vertical blinds can be installed using either option:
Fixed directly into the ceiling or lintel
Ideal for sliding doors and large openings
Fixed to the wall above the window frame
Provides extra clearance if required
Confirm the blind width suits your opening.
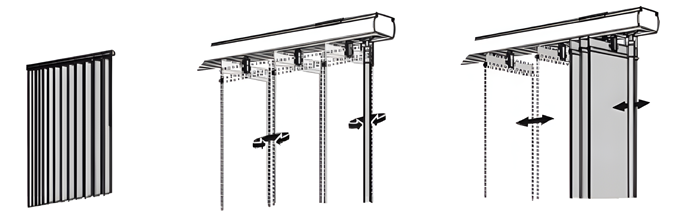
Hold the headrail in position and mark bracket locations:
One bracket near each end
One centre bracket for wider blinds
Use a spirit level to ensure all marks are straight.
Drill pilot holes at the marked positions.
Insert wall plugs if fixing into masonry or plasterboard.
Secure the brackets firmly using the supplied screws.
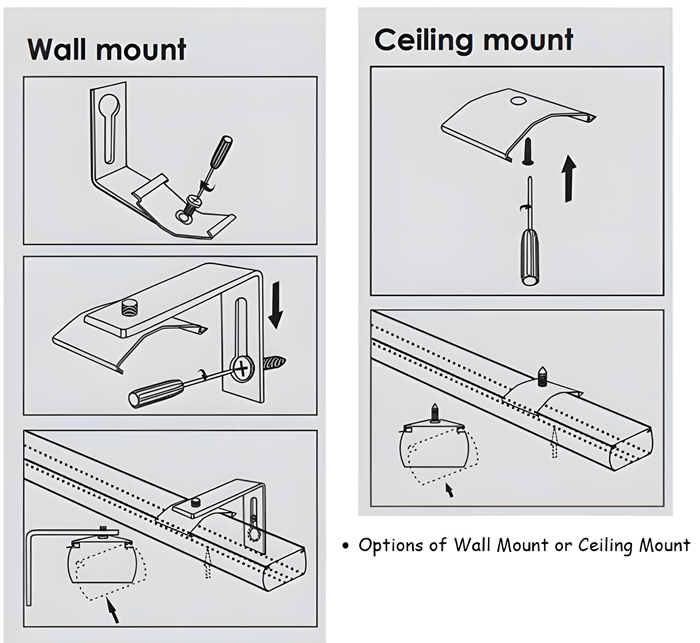
Align the headrail with the installed brackets.
Push the headrail upward until it clicks securely into place.
Check that the headrail is locked and level.
Your vertical blind features a DIY fold-down height adjustment design, allowing you to customise the drop easily without sewing.
The fabric slat is folded to the required height, secured using a plastic stick, then attached to the top hanger.
Any excess fabric is trimmed after the final height is confirmed.
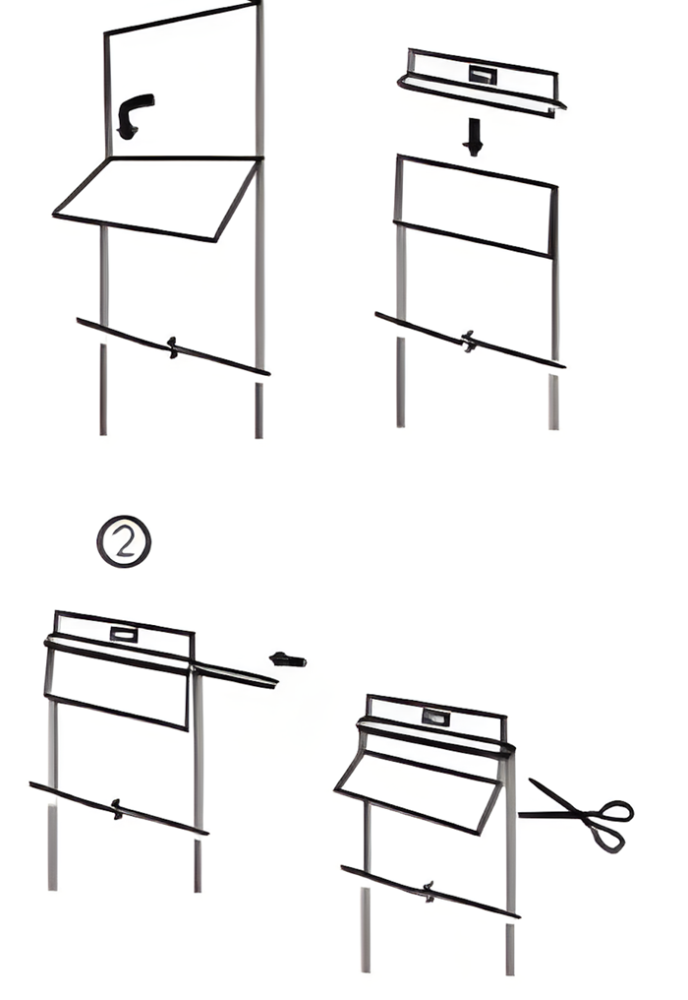
Measure from the installed headrail to the desired finished length.
Mark this height on each fabric slat.
Fold the top of the fabric slat downward to match the required height.
Ensure the fold is straight and even.
Slide the plastic stick into the folded fabric pocket.
Make sure it is fully inserted and centred.
This locks the fold in place and supports the fabric.
Insert the folded section (with plastic stick inside) into the top hanger.
Press firmly to secure the fabric.
Check that the fabric hangs straight.
Once the height is correct:
Cut off the excess fabric above the fold
Use sharp scissors for a clean finish
Repeat the process for all slats.
Tip: Adjust and test one slat first before completing the rest.
Rotate the control wand so all carriers are aligned.
Insert each slat hanger into the carrier hook until it clicks.
Ensure all slats face the same direction.
Correct operation during this step prevents track jamming.
Rotate the control wand so all carriers are fully aligned.
Insert one slat hanger into the carrier until it clicks.
After hanging each slat, gently turn the control wand to:
Confirm smooth rotation
Ensure the internal plastic carriers remain aligned
Important Warning
If a plastic carrier inside the track shifts out of position and is not corrected immediately:
The entire track may become stuck
The blind may not open or rotate smoothly
➡ Always rotate the wand after each slat is installed to prevent this.
Slide a bottom weight into the pocket at the bottom of each slat.
Ensure the weight sits flat and evenly.
Connect the plastic chain between the bottom weights of adjacent slats.
This keeps slats evenly spaced and stable.
Use the control wand to:
Rotate slats up to 180°
Open and close the blinds smoothly
Ensure slats rotate freely and move evenly along the track.
Child-safe cordless design
Do not force the control wand
Ensure brackets are firmly secured
Clean with a soft cloth or light vacuum