(Soft vertical sheer with centre-sheer + dual-side semi-blackout fabric)
VertiSheer track (assembled with carriers)
Ceiling/wall brackets
Fabric blades (each blade = semi-blackout → sheer → semi-blackout)
End blades
Wand control
Screws & accessories
Choose ceiling mount or wall mount.
Ensure the track is straight, centred, and level.
Mark bracket positions across the width.
For tracks ≥ 2 m, install a centre support bracket.
Drill pilot holes at the marks.
Insert wall plugs if installing into masonry or plasterboard.
Fasten the brackets securely.
Check all brackets are aligned.
Lift the track to the brackets.
Hook the back edge of the track into the bracket lip.
Push upward until the track clicks into place.
Confirm the entire track is firmly locked.
Each VertiSheer blade consists of:
⬛ Left Side: Semi-Blackout Fabric
⬜ Centre Panel: Sheer Fabric
⬛ Right Side: Semi-Blackout Fabric
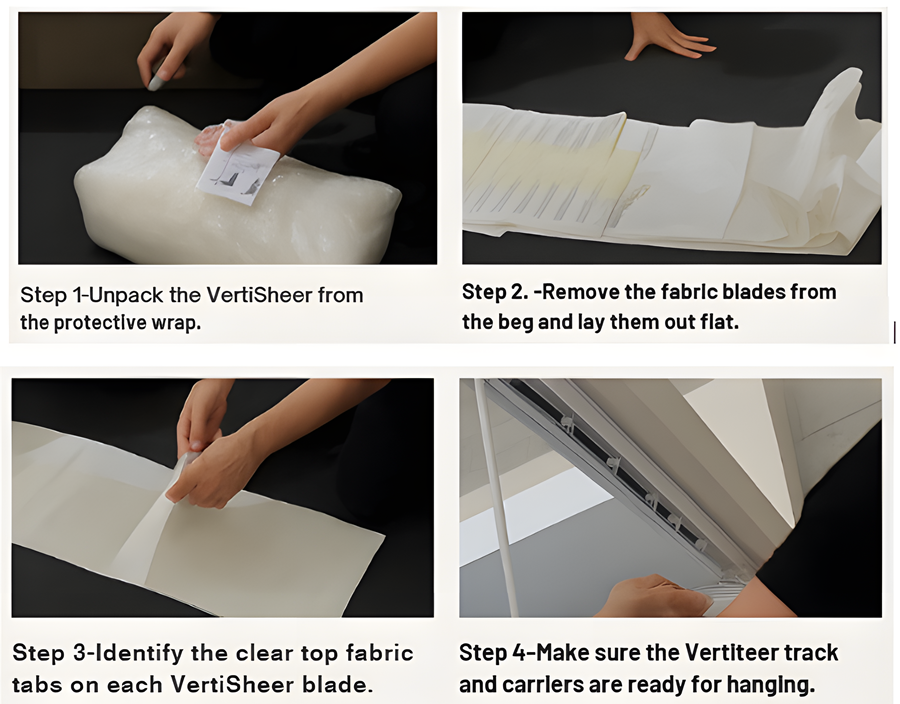
Before installation:
Carefully open the packing
Lay the blades flat for 10–20 minutes to relax creases
Identify the two end blades, which have a different finishing edge
Start with the blade closest to the wand
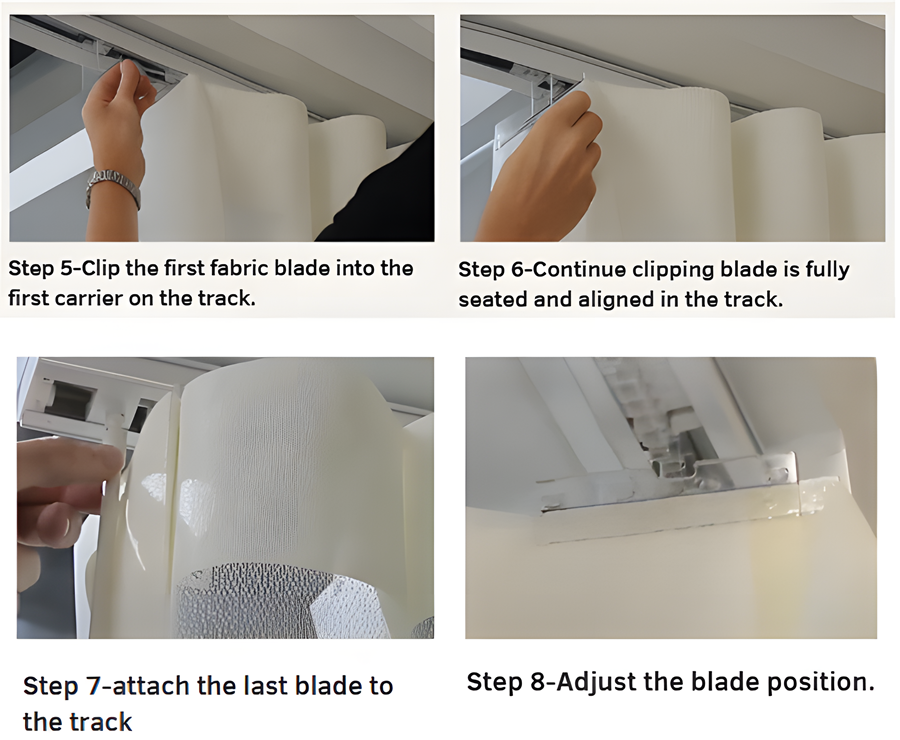
Insert the top fabric tab into the first carrier hook
Ensure the sheer centre faces forward
Hang the next blade, aligning:
Blockout → Sheer → Blockout pattern
Natural wave folds should form correctly
Continue clipping one blade per carrier across the track
Tip:
The blades alternate direction automatically due to the carrier design, creating the soft “S-wave” look.
Attach the left end blade
Attach the right end blade
These ensure a neat edge finish and stabilise the wave structure.
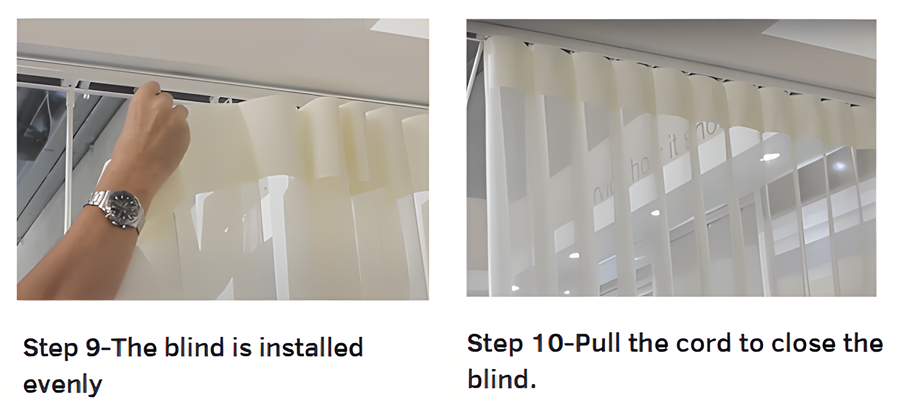
Slide the wand left to right to ensure smooth movement
Check each blade rotates/open-closes correctly
Ensure the natural wave falls evenly along the full width
If the wave is uneven:
Shuffle blades gently until each sits in the correct position
Your Consol VertiSheer is now fully installed.