You can install this gliding track as either:
Ceiling mount (flush to ceiling) – best for a clean, modern look and maximum curtain drop
Wall mount – using the supplied wall brackets
Choose the mount before measuring.
A. For Single Curtains
Measure the window width.
Add 15–20 cm on each side (total +30–40 cm) to allow curtains to stack off the window.
B. For Double Curtains (Sheer + Blockout)
Measure the same way; track length remains the same.
Only the brackets change (double brackets if required).
Make sure there is enough space for:
Curtain pleats (S-fold, pencil pleat, or pinch pleat)
Track gliders to move freely
Cornices/pelmets (if any)
Minimum recommended clearance:
Ceiling mount: 5 cm from wall
Wall mount: 8–12 cm projection (depending on curtain thickness)
Your track can be cut to size with a fine-tooth hacksaw.
Ensure to:
Cut from the opposite side of the metal end cap
Keep the cut straight
Reinsert the end cap firmly after cutting
Hold the track (or use a measuring tape) at the chosen height.
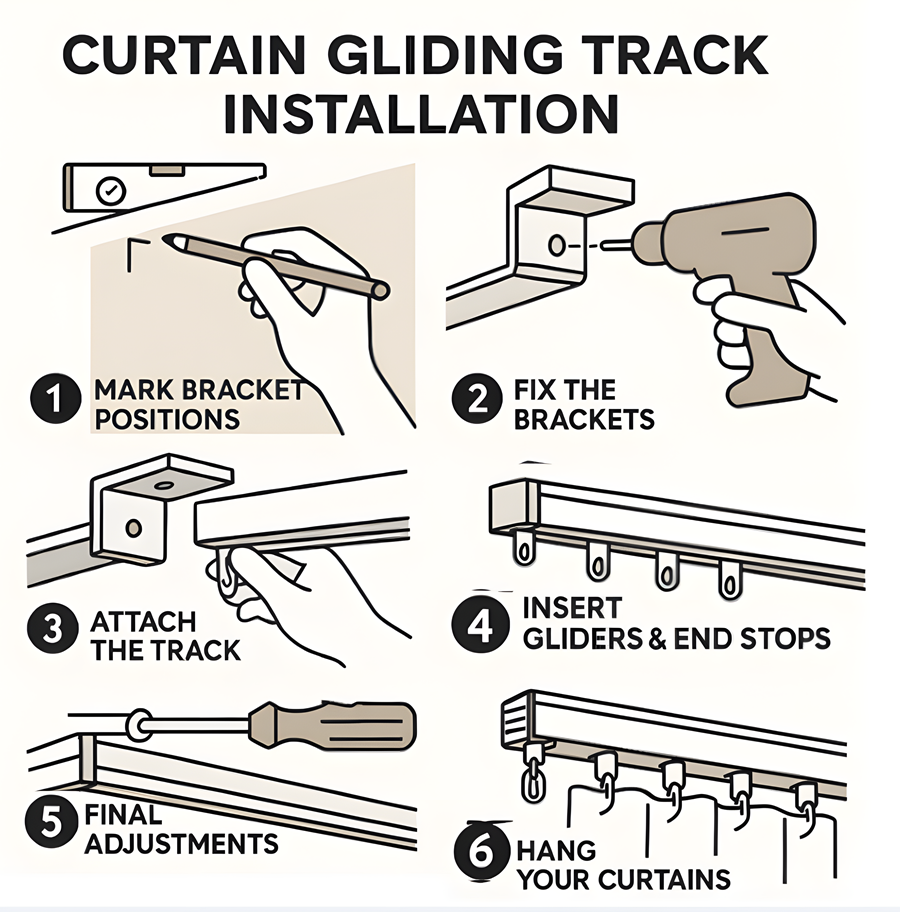
Mark bracket positions:
Two at each end
One in the centre for tracks longer than 2 m (add more for extra-long tracks)
Use a spirit level to ensure all marks are straight.
For wall mounting, check you have enough projection for curtain pleats.
Position the flat bracket directly on the ceiling.
Drill pilot holes.
Insert wall plugs (if mounting to masonry or plasterboard).
Screw brackets firmly into place.
Use the supplied wall brackets.
Adjust bracket projection if required.
Drill and secure with screws.
Tip: Ensure the brackets face the correct direction so the track can slide in and lock.
Hold the track under or onto the bracket.
Slide the track into the open channel on the bracket until it clicks or locks.
Check that the track:
Sits flat
Is locked securely
Moves slightly but does not fall out
For very long windows:
Use a joiner piece (optional accessory) to connect two tracks seamlessly.
Slide the gliders into the track slot.
Insert the required number for your curtain fullness.
Install the end stop on each side to prevent gliders from sliding out.
Reattach the metal end caps.
Depending on curtain heading style:
Insert curtain hooks into pleat pockets.
Hook onto the track gliders.
Use S-fold gliders & tape (optional accessory).
Clip gliders into the tape in even spacing.
Slide curtains across the track to ensure smooth operation.
Tighten all screws.
Ensure all end caps and end stops are firmly locked.