(For Triple Rail Panel Track 200–360 cm)
Measuring tape
Pencil
Drill
Phillips screwdriver
Wall plugs (for masonry or plasterboard)
Your panel blind set includes:
1 × Triple track (extendable)
5 × Mounting brackets (anchors)
Screws & wall plugs
5 × Panel carriers
1 × Bottom weight set
End caps
Ensure all parts are present before starting.
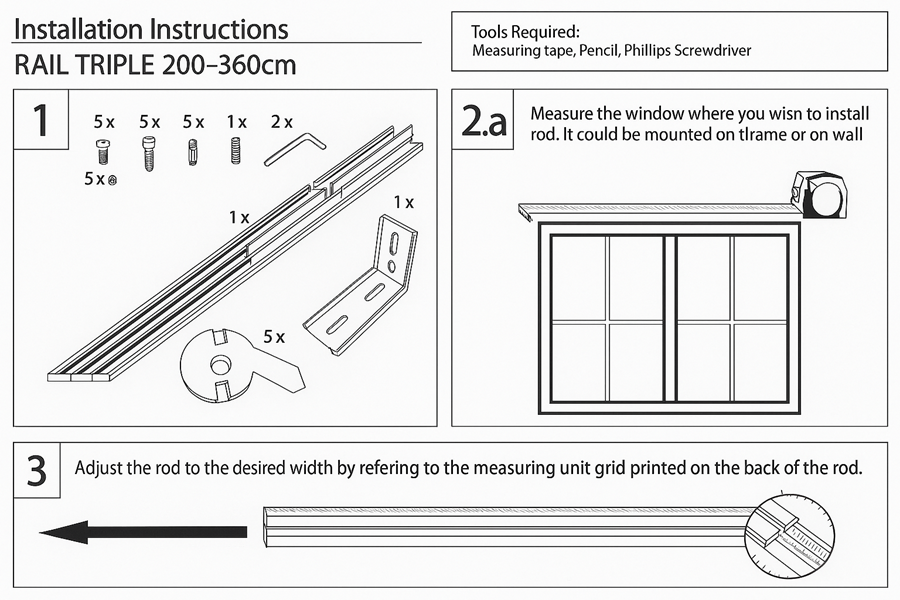
Measure the width of your window or opening.
The track can be installed in two ways:
On the wall (recommended for most windows)
On the window frame (if space allows)
Mark the total width you need to cover.
Extend the triple rail track to the required width.
Use the measuring scale printed on the back of the track to ensure both sides are extended evenly.
Attach the locking lever to the bracket as shown in the diagrams.
Wall mount: attach brackets above the window frame
Ceiling mount (e.g., for room dividers): screw brackets directly to the ceiling
Position the brackets evenly across the width of the track (5 brackets for triple rail).
Use a spirit level to ensure they are straight.
Drill pilot holes at your pencil marks.
Insert wall plugs if mounting into masonry or plasterboard.
Fasten brackets securely using the provided screws.

Lift the track and align it with brackets #2 and #3 first.
Push upward until all three rails sit properly in the bracket channels.
Slide track if needed to center it.
Follow the bracket locking steps:
Make sure the bracket’s locking latch sits parallel to the track.
Rotate the lever toward the track until it closes tightly.
The bracket is fully locked when the lever clicks closed firmly against the track.
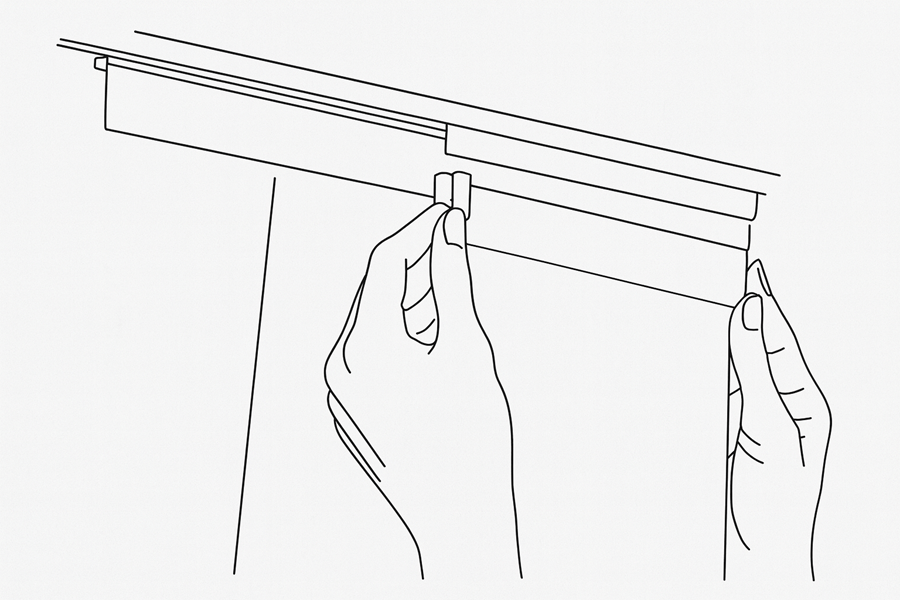
Insert the panel carriers (gliders) into the front, middle, and back rails.
Attach the fabric panels to the carriers by pressing the panel clips into the top mounting strip (as shown in your last image).
Ensure each panel hangs straight and the bottom weight bar is installed.
Slide panels across rails to confirm smooth movement.
Ensure all panels overlap correctly when closed.
Tighten any loose screws.
If you want, I can also create:
✔ A simplified quick-start version
✔ Illustrated step-by-step pages matching your brand style
✔ A PDF instruction sheet
✔ A marketing-friendly version for your website